Steamworks.NET is the package used to get your project ready for a Steam release.
https://steamworks.github.io/After it’s inportred into your Unity project, you will need to add a SteamManager GameObject as per the instruction on the installation page for Steamworks .NET. You will also need a .TXT file with your Steam AppID number inside it placed in your build folder that is ready for release.. More info below.
Making Use of Steamworks .NET
You can use it to get player names, check if DLC is owned and a whole ton of other stuff. You are required to make a Steam based script to make use of any of these options. Here is the one I use to see if Steam is initialized, get the persons Steam Name and check if DLC are owned. There is also a bunch of other crap in this script that I don’t feel like cleaning out because it may jog my memory on how to do something.
Just add this script onto an empty GameObject in the scene.
using UnityEngine;
using System.Collections;
using Steamworks;
using UnityEngine.UI;

public class MySteamScript : MonoBehaviour
{

    //public GameObject License_Info;
    public GameObject SteamNameDisplay;

    // Use this for initialization
    void Start()
    {


        if (SteamManager.Initialized)
        {
            //string name = SteamFriends.GetPersonaName();
            Debug.Log("Steam Initialized");
            string name = SteamFriends.GetPersonaName();
            Debug.Log(name);
            SteamNameDisplay.GetComponent<Text>().text = name;


            //***** Real DLC Checks happens in MapEditor_GUI *****

            // Check DLC_F1 Ownership [Free1]
            // Debug.Log("DLC_F1 Owned:" + SteamApps.BIsDlcInstalled((AppId_t)500840));

            // Check DLC_1 Ownership [Interiors]
            // Debug.Log("DLC_1 Owned:" + SteamApps.BIsDlcInstalled((AppId_t)497521));

            // Check DLC_2 Ownership [Graveyard]
            // Debug.Log("DLC_2 Owned:" + SteamApps.BIsDlcInstalled((AppId_t)506350));

            // Check DLC_2 Ownership [Caves]
            // Debug.Log("DLC_3 Owned:" + SteamApps.BIsDlcInstalled((AppId_t)510400));

            // Check DLC_4 Ownership [Landscape]
            // Debug.Log("DLC_4 Owned:" + SteamApps.BIsDlcInstalled((AppId_t)497520));

            // Check Commercial License Ownership
            //  Debug.Log("Commercial Owned:" + SteamApps.BIsDlcInstalled((AppId_t)503880));
            //  if (SteamApps.BIsDlcInstalled((AppId_t)503880) == true)
            //  {
            //      License_Info.active = true;
            //  }
            //  else { License_Info.active = false; }


            // Acheivements (Start the program)
            //   SteamUserStats.SetAchievement("ACHIEVEMENT_1");
            //   SteamUserStats.StoreStats();
            //   Debug.Log("Acievement Earned!");
        }
        else
        {

            Application.Quit();
        }

    }

    //    void achievement_cartographer()
    //    {
    //        // Call from another script in javascript: GameObject.Find("Steamworks").SendMessage("achievement_cartographer");
    //        // Acheivements (open the map editor)
    //        SteamUserStats.SetAchievement("CARTOGRAPHER_1_1");
    //        SteamUserStats.StoreStats();
    //        //Debug.Log("Acievement Earned!");
    //    }

    // Update is called once per frame
    void Update()
    {

    }

    public string Get_SteamName()
    {
        return SteamFriends.GetPersonaName();
    }


}
Building the App for Depot Upload
This requires the use of the Steamworks SDK which is a command prompt based program that will self update before doing anything. I give each release it’s own folder with the Steamworks SDK as it needs to have some script files edited to properly packaged and upload your release to Steam.
Once signed into your Steamworks account you can download the latest .ZIP file containing the SDK Files
https://partner.steamgames.com/dashboard
Once you have it downloaded uncompress it so it’s ready to have your new App or Game Build files added to it. Under ContentBuilder in the SDK folder you will have access to what we need to build the game package and upload it to Steam.
EXAMPLE: G:\Ambient_DM\steamworks_sdk_137\sdk\tools\ContentBuilderAppID (Required for Building)
The AppID is the unique ID steam gave your app once you have paid the fee to have a Game for sale on Steam.

The AppID can be found with the application name, in brackets, within steamworks.

DepotID (Required for Building)
The DepotID or Depot Number let steam know which build of the game you are uploading as you can have multiple version. 32bit, 64bit, Mac, Linux, Beta Testing and Patch Testing releases to name a few. This number is need for the build scripts and is normally the AppID with an incremented number for the last digit.
Edit the build scripts for your Project
When you want to build the package of your game files to upload to steam you need to edit two script files to reflect your AppID and DepotID., so Steam know what you are uploading and which release depot it is. In the “SCripts” Folder there are two scripts you can open in Notepad and edit easily.
app_build_1001.vdf
You must rename this file, replacing the “1001” with your AppID.
In this script it asks for your AppID and your DepotID.
You will notice that the AppID is: 1050330 and the DepotID is: 1050331. It also makes reference to the second script we need to edit called depot_build_1001.vdf. You must change the “1001” to match your DepotID as we will be renaming the second script to match. Here you can see it has already been renamed.
"appbuild"
{
	// Set the app ID that this script will upload.
	"appid" "1050330"

	// The description for this build.
	// The description is only visible to you in the 'Your Builds' section of the App Admin panel.
	// This can be changed at any time after uploading a build on the 'Your Builds' page.
	"desc" "Your build description here"

	// Enable/Disable whether this a preview build.
	// It's highly recommended that you use preview builds while doing the initially setting up SteamPipe to
	// ensure that the depot manifest contains the correct files.
	"preview" "0"

	// File path of the local content server if it's enabled.
	"local" ""

	// Branch name to automatically set live after successful build, none if empty.
	// Note that the 'default' branch can not be set live automatically. That must be done through the App Admin panel.
	"setlive" ""


	// The following paths can be absolute or relative to location of the script.

	// This directory will be the location for build logs, chunk cache, and intermediate output.
	// The cache stored within this causes future SteamPipe uploads to complete quicker by using diffing.
	"buildoutput" "..\output\"

	// The root of the content folder.
	"contentroot" "..\content\"

	// The list of depots included in this build.
	"depots"
	{
		"1050331" "depot_build_1050331.vdf"
	}
}
depot_build_1001.vdf
You must rename this file, replacing the “1001” with yourDepotID.
This script needs your DepotID entered at the top, it also need the complete path to your game files you want to be uploaded to Steam. As you can see from teh script they are stored in a folder called “content”. I’ve put them in an X64 folder as well incase I want to make a 32bit guild as well. but normally your files just go in the content folder.. we will get tot that later.
"DepotBuildConfig"
{
	// Set your assigned depot ID here
	"DepotID" "1050331"

	// Set a root for all content.
	// All relative paths specified below (LocalPath in FileMapping entries, and FileExclusion paths)
	// will be resolved relative to this root.
	// If you don't define ContentRoot, then it will be assumed to be
	// the location of this script file, which probably isn't what you want
	"ContentRoot"	"G:\Ambient_DM\steamworks_sdk_137\sdk\tools\ContentBuilder\content\X64\"

	// include all files recursivley
  "FileMapping"
  {
  	// This can be a full path, or a path relative to ContentRoot
    "LocalPath" "*"

    // This is a path relative to the install folder of your game
    "DepotPath" "."

    // If LocalPath contains wildcards, setting this means that all
    // matching files within subdirectories of LocalPath will also
    // be included.
    "recursive" "1"
  }

	// but exclude all symbol files
	// This can be a full path, or a path relative to ContentRoot
  "FileExclusion" "*.pdb"
}
Prepping Your Game Files
When you make an App or Game in unity you need to “Build” the game into a folder in order to use it outside of the unity editor. Once you have your game built and ready to use, you need to make sure you have your steam_appid.txt file inside that build folder. That file simply included your AppID as the only text in the file.
EXAMPLE: 1050330NOTE: If you are using AssetBundles you will need to copy the “AssetBundles” Folder from inside you Unity Project and place it inside your games “Data” folder. The last build I did while writing this had a data folder called “Ambient DM_Data”.
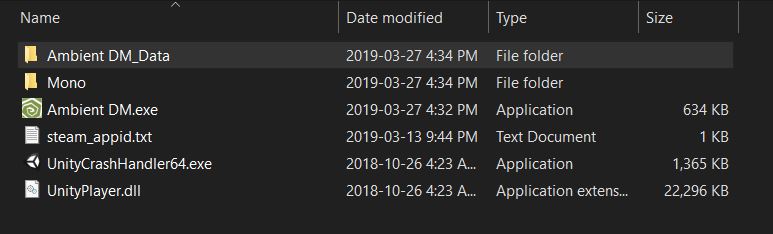
Copy all of the files from your final build folder and paste them into the “content” folder as these are the files Steam will upload.
EXAMPLE: G:\Ambient_DM\steamworks_sdk_137\sdk\tools\ContentBuilder\contentRunning the Builder
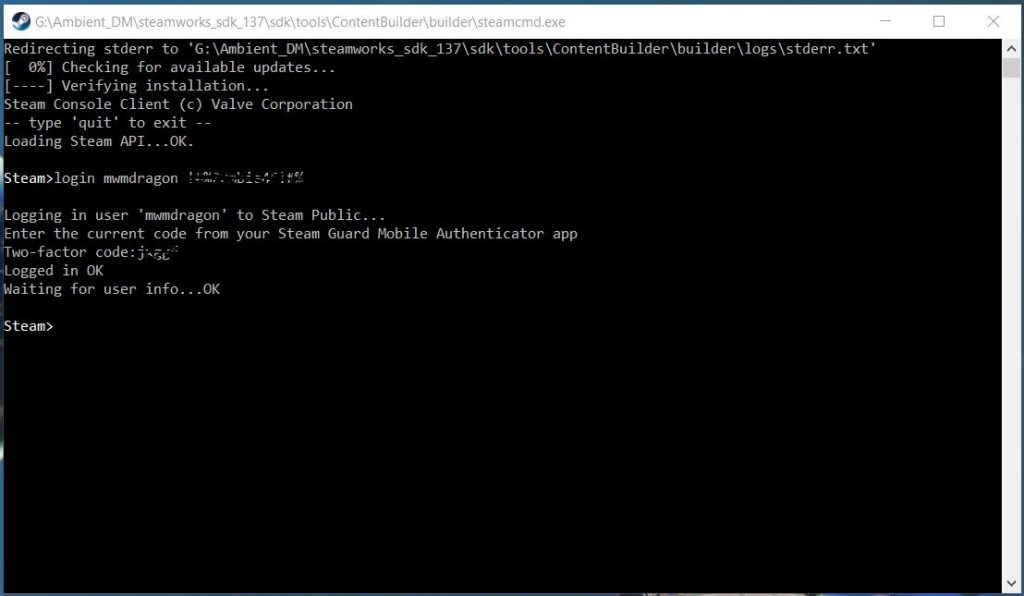
Still within the Steamworkd SDK’s “ContentBuilder” folder we want to go into the “builder” folder. And run the “steamcmd.exe” file. After it tries to update it will give you a command prompt where we need to login to steam and then tell it to run the building script.
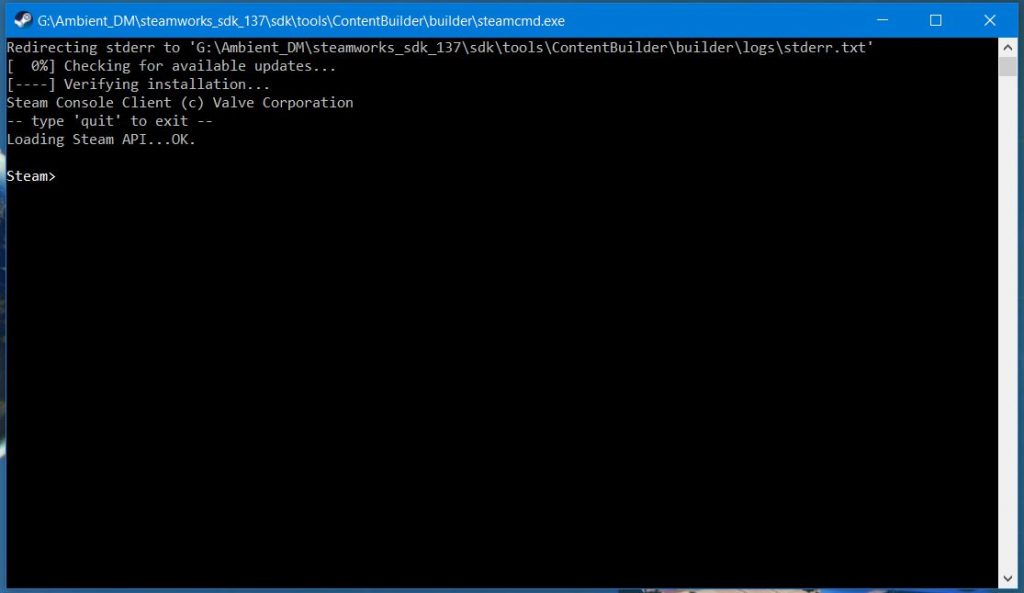
Login to Steam using your account information using the command shown below. if you have 2-factor sign-in enabled it will ask you for your authenticator number.
login username passwordNOTE: Doing this will kick your Steam game client off of Steam, so it will say “DISCONNECTED” and need to be restarted if you want to play any games later.
Next we will be running those scripts we edited earlier with the AppID and DepotID inside them and then the build and upload will start.
run_app_build G:\Ambient_DM\steamworks_sdk_137\sdk\tools\ContentBuilder\scripts\app_build_1050330.vdfNOTE: Remember to rename the “app_build_1050330.vdf” script name to be your App script name or it won’t work.. also make sure you put the complete path to that script or it will fail. If your AppID or DepotID are wrong it will chug along building the files into a release and then give you an error saying that there was a “Wrong Parameter”.
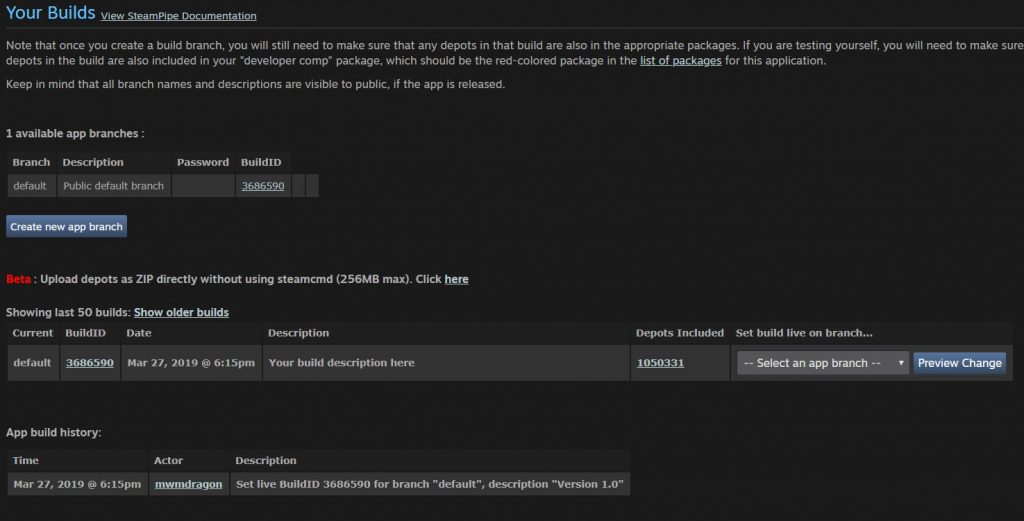
If everything was done correctly, the script with package the files and upload them, using dots to show progress.. this can take some time depending on your upload speed. You can now set this build as active in your Steamworks page on the steam website.. remember to click publish after you have set the new build as the default release.