Wanting to create a pinball minigame I needed to create realistic pinball flippers, which were the second most important step after learning how to setup the gravity to make the ball move realistically. (Which I will also add into this note for future reference.)
Because Hinge Joints internal springs aren’t a simple variable and a part of a ‘struct’ which needs all of the variables set at once and then have them applied to the spring all at once. (I know right, If I had hair I would have ripped it out building this Graph because it didn’t follow the rules I was use to using.. damn structs.
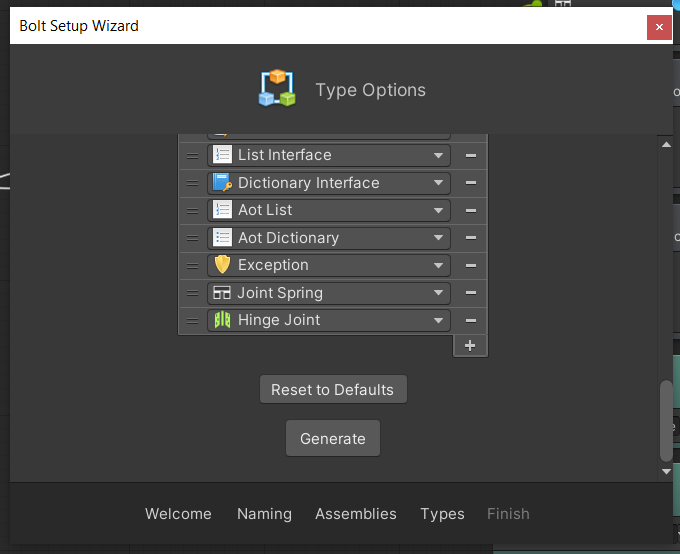
In order to access the “Joint Spring” inside the “Hinge Joint” we need to add it to the Bolt Type Options.
Before we get to the graph I want to explain what it’s doing and why it acts differently then setting other component options, keep in mind the struct thing we mentioned above.
We need to first get the Hinge Joint when the program starts. We then get the joint spring that it’s using. Then we create a new spring. Next we apply all 3 variable changes to the new spring, and then replace the old spring with the new one.. applying all of the changes we wanted to the three options of ‘spring’, ‘damper’, ‘target position’. (What a long way around.)
Here is the Graph with a left and right pinball flipper that flip up 45 degrees when the correct input is pressed.
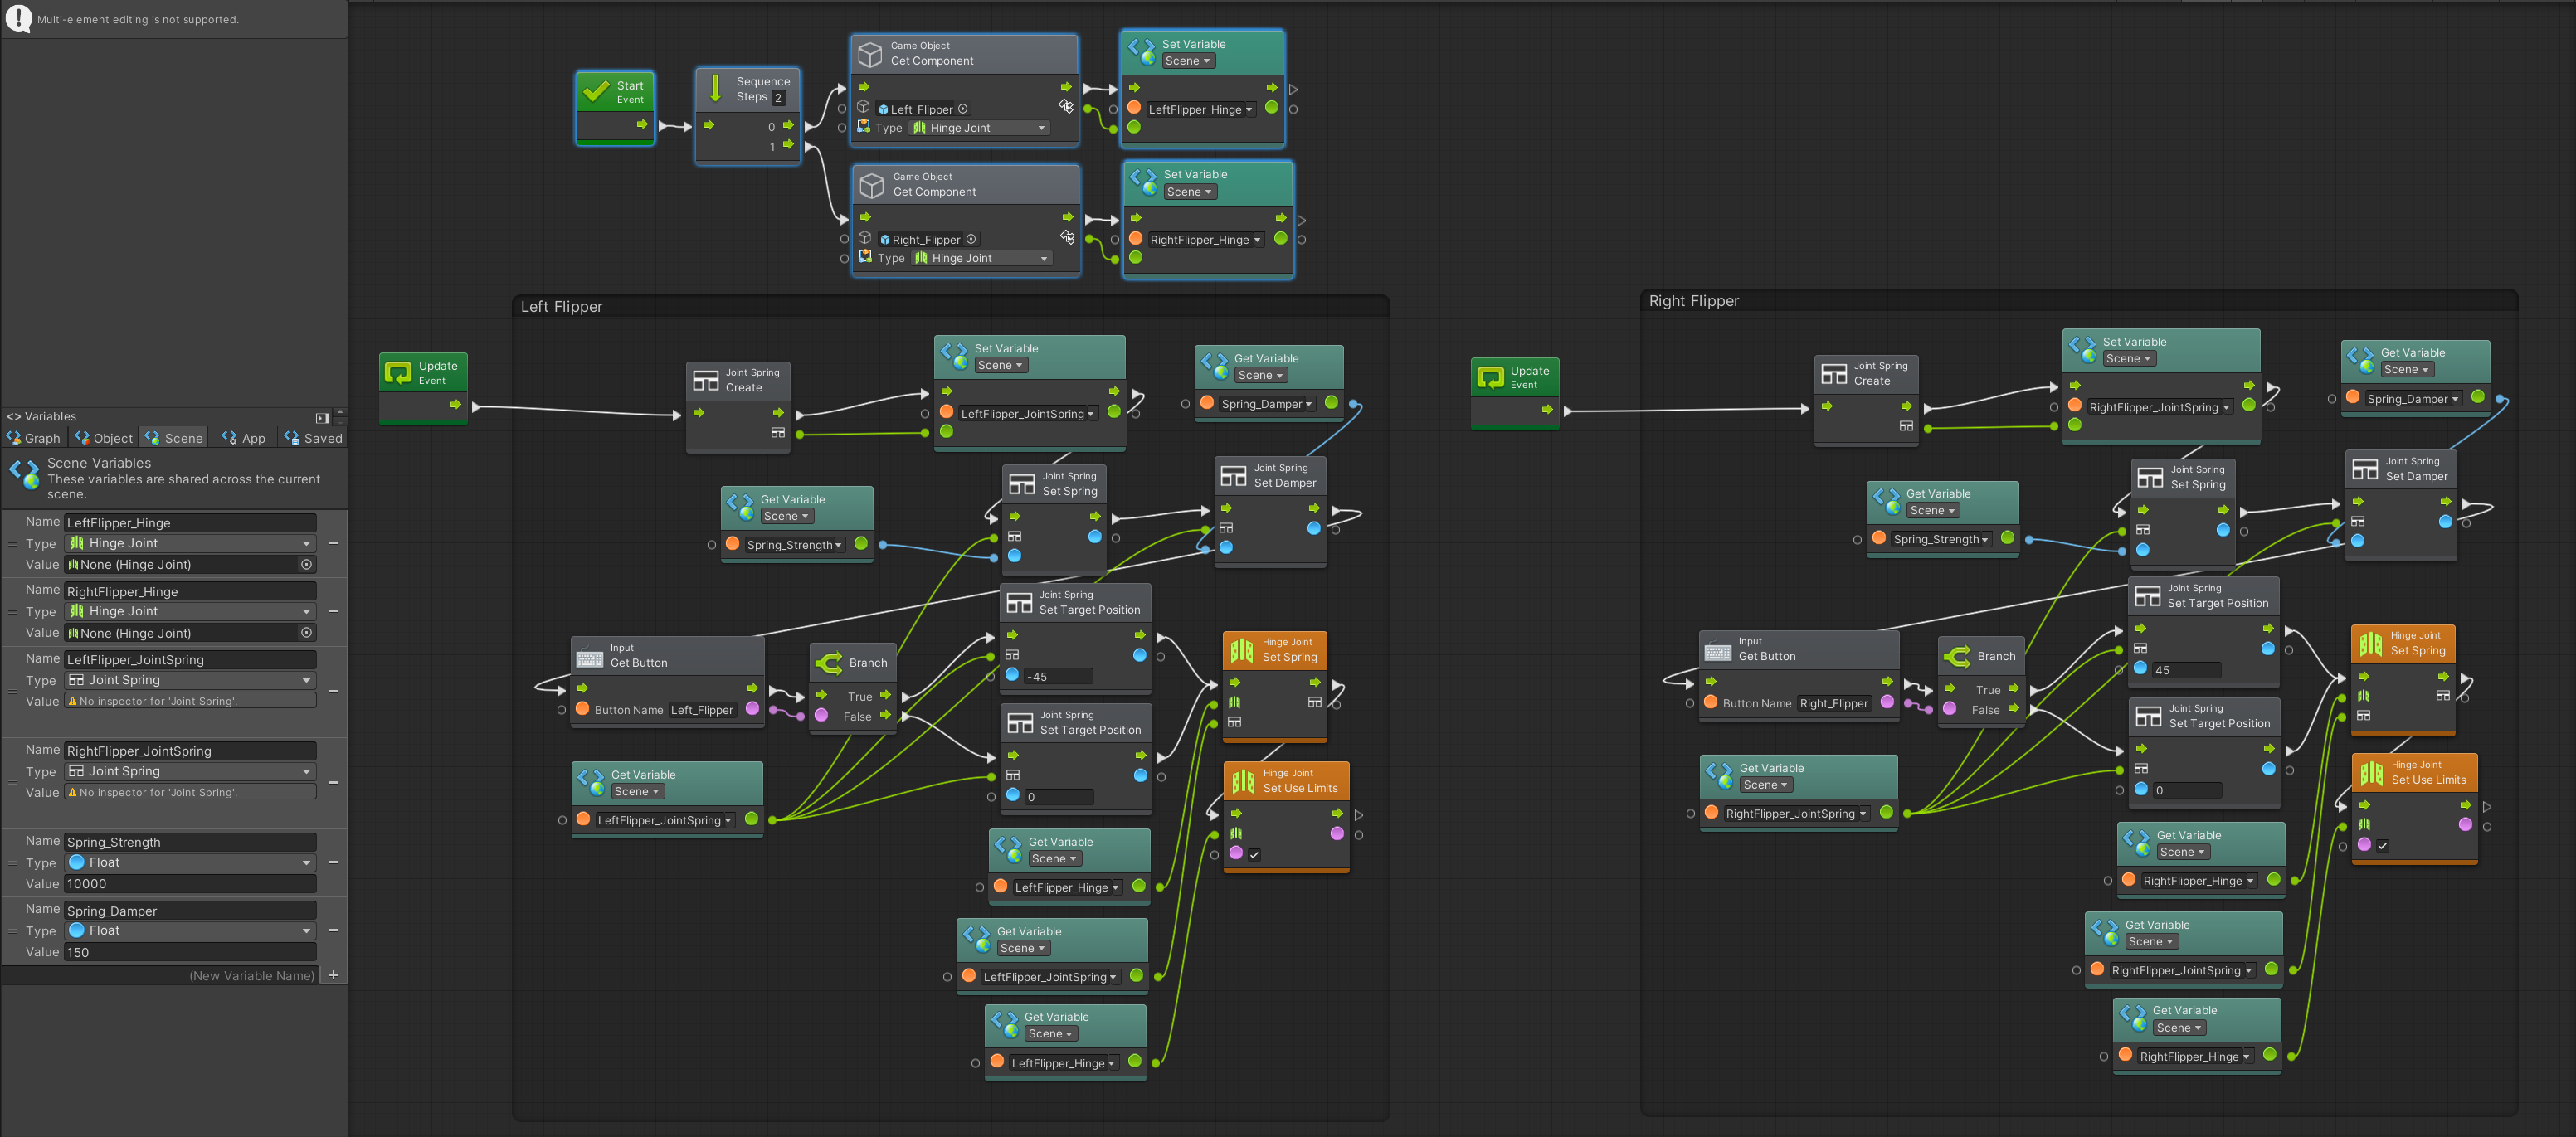
We setup variables for spring and damper so that we could change them quickly for testing but if you are getting this advanced in bolt you should be able to understand what this graph is doing.
Pinball Gravity
As a bonus here is how we setup the pinball gravity for this scene and set it back in other scenes so each scene can have it’s own gravity since the project that this is for has multiple mini games.
