This reference is based on the information I gather about the LMS communication API called Scorm, version 1.2

API Functions

LMSInitialize(“No Options”) – Returns a bool

using Scorm;
using System;
using System.Collections.Generic;
using System.Linq;
using UnityEngine;
using UnityEngine.UI;
using Bolt;

public class Scorm_Link : MonoBehaviour
{
    IScormService scormService;

    void Awake() {

        #if UNITY_EDITOR
            scormService = new ScormPlayerPrefsService(); 
            // PlayerPrefs Implementation for editor testing
       
        #else
            scormService = new ScormService(); // Real implementation
        
       #endif
        
      bool result = scormService.Initialize(Scorm.Version.Scorm_1_2);
        if (result)
        {
            Debug.Log("Can Use SCORM 1_2 Functions");
        }
    }
}

Begins a communication session with the LMS. This needs to be called in order to use the Scorm API. [Unity Note: There is an option for this call and it’s setting the version of Scorm to be used]

This example is using the Unity ScormAPI plugin. It is also checking if the program is being tested in the Unity Editor, and if it is then it uses “PlayerPrefs” to act as the Scorm info holder.

LMSFinish(“No Options”) – Returns a bool

Ends the communication session with the LMS.

LMSGetValue(Data Model) – Returns a String

Retrieves a value from the LMS

LMSSetValue(Data Model, Value as a string)

Saves a value to the LMS

LMSCommit(“No Options”) – Returns a bool

To be called after you set a value to ensure that the data is persistent. (Not Required)

LMSGetLastError(“No Options”) – returns an error code

Returns a numeric error code the resulted form the last API call.

LMSGetErrorString(Error Code) – Returns a String

Returns a short String describing the specific error code.

LMSGetDiagnostic(Error Code) – Returns a String

Returns a detailed String description about a specific error code.


Data Model

cmi.core.student_id(String)

Read Only – Can return up to 255 characters.

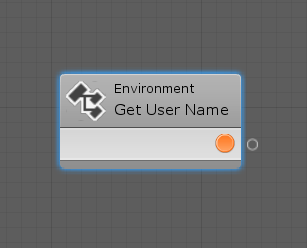
cmi.core.student_name(String)

Read Only – Can return up to 255 characters.

cmi.core.student_location(String)

Read and Write – Can contain up to 255 characters. This data model holds where the learner is in the module.
Example: You can set this to be “Question 3” and then the LMS will remember that the learner was at this point in he module.

cmi.core.credit(Arguments)

Read Only[Arguments]: “credit”,”no credit”
Indicates if the learner will be credited for their performance.

cmi.core.lesson_status(Arguments)

Read and Write – [Arguments]: “passed”, “completed”, “failed”, “incomplete”, “browsed”, “not attempted”
Indicated whether the learner has completed and satisfied the requirements.

cmi.core.entry(Arguments)

Read Only – [Arguments]: “ab-initio”, “resume”, ” “
Asserts whether the learner has previously accessed the module.
Note: Ab-Initio is legal speak for “From the Beginning”


cmi.core.score.raw(Float)

Read and Write – A number that reflects the performance of the learner relative to the range bound by the Min and Max score values.

cmi.core.score.max(Float)

Read and Write – The maximum value in the range of the raw score.

cmi.core.score.min(Float)

Read and Write – The minimum value in the range of the raw score.

Creating a timer in bolt wasn’t working for me so I wrote a script for it and then just integrated it with Bolt variables.

using System.Collections;
using System.Collections.Generic;
using UnityEngine;
using UnityEngine.UI;
using Bolt;

public class StopWatch : MonoBehaviour
{

    public Text text;
    float theTime;
    public float speed = 1;
    

    // Use this for initialization
    void Start()
    {
        //text = GetComponent(-INSERT LESS THAN SIGN -)Text(-INSERT GREATER THAN SIGN -)();
    }

    // Update is called once per frame
    void Update()
    {
    
        if ((bool)Variables.ActiveScene.Get("Timer_Running") == true)
        {
            theTime += Time.deltaTime * speed;
            string hours = Mathf.Floor((theTime % 216000) / 3600).ToString("00");
            string minutes = Mathf.Floor((theTime % 3600) / 60).ToString("00");
            string seconds = (theTime % 60).ToString("00");
            text.text = hours + ":" + minutes + ":" + seconds;
        }
    }

    public void ClickPlay()
    {
        
        Variables.ActiveScene.Set("Timer_Running", true);
    }

    public void ClickStop()
    {
        Variables.ActiveScene.Set("Timer_Running", false);
    }


}

You need to create two scene based variables.

  • theTime
  • Timer_Running

This script puts the timer in the text area on the UI. Just drag and drop this script onto an object in the scene and then drag and drop a text box into the variables area of the script, and you will be up and running. This time is great for timed games and in LMS software to see how long content takes to complete.

Count Down Timer

Here is a countdown timer pretty much working on the same variables

using System.Collections;
using System.Collections.Generic;
using UnityEngine;
using UnityEngine.UI;
using Bolt;

public class CountDown : MonoBehaviour
{
    public float timeRemaining = 10;
    public bool timerIsRunning = false;
    public Text timeText;

    private void Start()
    {
        // Starts the timer automatically
        timerIsRunning = true;
    }

    void Update()
    {
        if ((bool)Variables.ActiveScene.Get("Timer_Running") == true)
        {
            if (timeRemaining > 0)
            {
                timeRemaining -= Time.deltaTime;
                DisplayTime(timeRemaining);
            }
            else
            {
                Debug.Log("Time has run out!");
                timeRemaining = 0;
                timerIsRunning = false;
                Variables.ActiveScene.Set("Timer_Running", false);
                Variables.ActiveScene.Set("Time_Out", true);
            }
        }
    }

    void DisplayTime(float timeToDisplay)
    {
        timeToDisplay += 1;

        float minutes = Mathf.FloorToInt(timeToDisplay / 60);
        float seconds = Mathf.FloorToInt(timeToDisplay % 60);

        timeText.text = string.Format("{0:00}:{1:00}", minutes, seconds);
    }
}

We have worked with calling bold variable functions from within a script before, but now we are looking to use Bolt to call a custom Function from within a script.

After you have created the Class containing the function. You need to add that script as a component of the object that also has the Bolt “Flow Machine” component on it.

You then need to tell bolt to look for this new class, that way it can make use of the functions in the class. You can do this by choosing

Tools > Bolt > Update Unit Options

in the unity menu. After this has complete, add a new Unit in your Bolt flow graph and search for your functions name. You should be able to choose your function now.

The function just happens to have the same name as the script in this demonstration.

This allows us to create any function we want and integrate it with Bolt!

Using SQLite in Unity allows for full database access without having to send out external information or commands, as the database in stored with the game or app. This is not meant for secure information as anyone can open the database.

I haven’t tried any of this in BOLT yet but I will add to this post after I have tried it.

Steps to get setup

  1. Create a new folder under Assets called “Plugins” if there isn’t already one there.
  2. Download SQlite
  3. Copy “sqlite3.def” and “sqlite3.dll” into that Plugins folder you just created.
  4. Download an SQLite database manger program
  5. User the database manager program to create a new database in your projects “Assets” folder. (Make note of the full name of this database file)
  6. Copy “System.Data.dll” and “Mono.Data.Sqlite.dll” from your Unity install path + ” \Unity \Editor\Data\Mono\lib\mono\2.0 ” and paste them into the Plugins folder that you created.

If you are using Bolt in the project some of these files are already included and will give you an error in teh console until you remove the duplicate. Just delete the files mentioned as being duplicated in the console and everything will still work.

When used with Bolt.

You are now ready to create the C# code to connect to the database. Here is an example.

using System.Collections;
using System.Collections.Generic;
using UnityEngine;

using Mono.Data.Sqlite;
using System.Data;
using System;


public class databasetest : MonoBehaviour
{
    // Start is called before the first frame update
    void Start()
    {
        string conn = "URI=file:" + Application.dataPath + "/leaderboard.db"; //Path to database.
        
        Debug.Log(conn);
        IDbConnection dbconn;
        dbconn = (IDbConnection)new SqliteConnection(conn);
        dbconn.Open(); //Open connection to the database.
        IDbCommand dbcmd = dbconn.CreateCommand();
        string sqlQuery = "SELECT score_id, player_name, player_score " + "FROM Leaderboard_Table";
        dbcmd.CommandText = sqlQuery;
        IDataReader reader = dbcmd.ExecuteReader();
        while (reader.Read())
        {
            int score_idx = reader.GetInt32(0);
            string player_namex = reader.GetString(1);
            int player_scorex = reader.GetInt32(2);

            Debug.Log("scoreID= " + score_idx + "  name =" + player_namex + "  score =" + player_scorex);
        }
        reader.Close();
        reader = null;
        dbcmd.Dispose();
        dbcmd = null;
        dbconn.Close();
        dbconn = null;
    }

    // Update is called once per frame
    void Update()
    {
        
    }
}
  1. Replace “leaderboard.db” with the name of your database
  2. Edit “SELECT score_id, player_name, player_score ” + “FROM Leaderboard_Table” to reflect actual columns and tables from your database.
  3. Put this script on an active gameObject in your screen and the Console area should show you the information from your database.

If you are getting complaints about the Table not being found. Take a look at the name of your database and make sure it matches your code. My code said “Leaderboard.s3db” but my actual database was called “leaderboards.db”

SQLite creates a new empty database if it fails to find the one you specified in code, and that database will be completely empty, leading to the lack of finding a table.

Inserting data into the database

using System.Collections;
using System.Collections.Generic;
using UnityEngine;

using Mono.Data.Sqlite;
using System.Data;
using System;


public class database_senddata : MonoBehaviour
{
    // Start is called before the first frame update
    void Start()
    {
        string conn = "URI=file:" + Application.dataPath + "/leaderboard.db"; //Path to database.

        //Debug.Log(conn);
        IDbConnection dbconn;
        dbconn = (IDbConnection)new SqliteConnection(conn);
        dbconn.Open(); //Open connection to the database.
        IDbCommand dbcmd = dbconn.CreateCommand();
        
        // Getting Info From Database
//        string sqlQuery = "SELECT score_id, player_name, player_score " + "FROM Leaderboard_Table";

        // Sending Info to Database
        string sqlQuery = "INSERT INTO Leaderboard_Table (player_name, player_score) VALUES ('newentry','1000')";

        dbcmd.CommandText = sqlQuery;
        IDataReader reader = dbcmd.ExecuteReader();

        // Getting information from the database **************************************
        //        
        //        while (reader.Read())
        //        {
        //            int score_idx = reader.GetInt32(0);
        //            string player_namex = reader.GetString(1);
        //            int player_scorex = reader.GetInt32(2);
        //
        //            Debug.Log("scoreID= " + score_idx + "  name =" + player_namex + "  score =" + player_scorex);
        //        }
        //
        // ****************************************************************************


        // Sending information to the database Just requires the sqlQuery be changed to an INSERT

        reader.Close();
        reader = null;
        dbcmd.Dispose();
        dbcmd = null;
        dbconn.Close();
        dbconn = null;
    }

    // Update is called once per frame
    void Update()
    {

    }
}

This code is the same as above except the reading of data has been commented out and an INSERT command had been put in it’s place. This allows us to add information to the database.

Here are the data types for SQLite

how this came about is that I was trying to store a .SWF file in an asset bundle and then load it at runtime, so that I could send it’s location to a stand alone flash player. This way it would load locally and not in a browser, so I would have full control over compatibility.

Unity limits the type of files that can be put into assetbundles so you need to change the extension on the file to “.bytes” and then it will be packed into the assetbundle as is.

You then load that file out of the assetbundle as a byte array and write it to a temporary file in your Assets folder at runtime, changing the extension on the file to be whatever is needed, in this case “.SWF”.

You now have a file taken out of the assetbundle and in a location where you can do anything with it. This allows you to store any file type inside an assetbundle and retrieve it for use in any way you like!

This process in BOLT

This has been used for an in-game notification icon that blinks when a new notification is available.

A Scene bool variable called “NewNotification” triggers this code to be run. During the code block we need to wait for the fading and unfading to complete before the “OnUpdate” tells the block of code to run again. If it tries to start it again before it’s done the blinking cycle, it makes the blink fail. To support this we have a Graph based bool variable called “Blinker”

If Blinker is true our block of code know that the blink hasn’t finished yet and waits until the bool is False again, meaning that it can initiate another blink.

Note: This code block must be set as a co-routine as we use Wait Timers.

Using bolt for the bulk of a projects can speed up development, however bolt doesn’t integrate with everything you may want to import into your projects like specialized assets from the unity asset store. To access the Bolt variables using c# code you can write small scripts what make use of one of the most powerful features in bolt.

using Bolt;
//**** SET ****
// Application Variables
Variables.Application.Set("DLC1_Owned", true);

// Scene Variables
Variables.ActiveScene.Set("Timer_Running", true);


//**** GET ****
//
(bool)Variables.ActiveScene.Get("Timer_Running");

This code lets the project know that you want to use Bolt references inside this script and then second line of code sets the Application level variable called “DLC!_Owned” to True (As it’s a bool variable)

Refernce: https://ludiq.io/bolt/manual/scripting/variables

Some projects have folders that allow users to add their own files into the software at runtime. A great way to alleviate the stress of finding that folder is to have a button in the software that opens it for them.

public void ViewOGGsFolder()
    {
  System.Diagnostics.Process.Start(Application.dataPath+"/OGGs/");
    }

This code can be attached to an onclick event of a button and when that button is clicked it will open the “OGGs” folder from within the Assets of the software.

Not as relevant when you are using Steam but if you wanted to use a program in a corporate environment that makes use of an SSO or Single Sign On in Windows, this is how you can retrieve that information from within Unity. The first version of BOLT does not support this so it must be done in code. Here is the code that will sent the username of the person currently signed into windows, to the console window when the program starts.

using System;
using System.Collections;
using System.Collections.Generic;
using UnityEngine;

public class testing : MonoBehaviour
{
    // Start is called before the first frame update
    void Start()
    {
        Debug.Log(Environment.UserName);
    }

    // Update is called once per frame
    void Update()
    {
        
    }
}

The important part is the “Environment.UserName” but it requires that you have the “using System;” declared or it won’t work.

UPDATE:

In the Bolt setup wizard if you add “Environment” to the types list you will be able to access Environments from within the Graphs.

You can add a lot of new features to Bolt in this way.
Bolt is easily expanded.

When using a Scroll View in unity, you can set it’s size or have it dynamically scale. I’m many projects dynamic scaling seems to be the best option. To make the scroll view auto scale you need to add two components to the content object.

The Content Object contains the objects that need to be scrolled to be viewed.

A “Content Size Fitter” set to constrain the view-able area to the preferred size is needed to keep the scroll bars updated.

A Grid Layout Group will make sure the content in the “Content” object are displayed in a nice orderly fashion and at the size they are supposed to be viewed. the “Cell Size” should be set to the individual content size. if you are displaying more than one content item at a time then setting the spacing between the items makes everything look well organized.